Blog Statement

Life is too short to eat bad food! Sharing great recipes, farm life, stories and photography from our Northern California dairy farm.

TDM CCN Header

Showing posts with label kids cooking. Show all posts

July 9, 2011

Frozen Fruit and Yogurt Pops

My kids LOVE frozen pops and I admit, I do as much as they do.  Want an easy recipe to make at home?  Here's one that won't disappoint....


Photo from Williams Sonoma
This is also a fun project to do with your kids.  Fun for a child's birthday party, slumber party or get together!  You can be creative and use your favorite flavors.

Ingredients:

1 cup strawberry yogurt
1 cup orange juice
1 1⁄2 cups raspberry juice

Directions:
Set eight 5-ounce popsicle molds or paper cups on a work surface. Spoon an equal amount of the yogurt into each mold or cup and press down with the spoon to fill the bottom evenly. Cover the molds. If using cups, cover each with a square of aluminum foil, pressing it firmly around the sides. Poke a popsicle stick through each foil cover, pushing it into the middle of the yogurt. Set the molds or cups in the freezer until beginning to set, about 40 minutes.

Remove the molds from the freezer. If using cups, carefully lift off the foil but leave the sticks in place. Pour an equal amount of the orange juice into each mold or cup. Cover, return the molds or cups to the freezer and freeze until firm, about 40 minutes. Repeat the procedure with the raspberry juice. Freeze until solid, about 4 hours or up to overnight.

To serve, slip the pops from the molds or remove the foil and peel away the paper cups. Makes 8 pops.

Adapted from Williams-Sonoma The Kid's Cookbook, by Abigail Johnson Dodge Pin It

March 25, 2011

Kids....Get Cookin'!

Yesterday at Marin County Farm Day, one of the booths Bryce stopped at had a spin the wheel game that the kids could play and receive prizes.  He was ecstatic when he came back with his very own kid's cookbook.  It's titled Kids......Get Cookin'! and it's put out by the CA Dept. of Public Health and here's the link to the pdf version of it {English and Spanish}:  Kids...Get Cookin'!  for all 23 kid friendly recipes.

Today was my day to teach cooking to the K-1 class at Bryce's one-room school and he thought it would be a good idea to pick a recipe out of his new cookbook.....so we did.  Smoothie day!

Here's what you need: 
1/4 cup milk
1/4 cup o.j.
1/4 cup yogurt
1 banana  
1/2 cup frozen berries
Blend all together in a blender or Magic Bullet and serve.


There are only four kids in the K-1 class at school, they're all high energy boys, so when I can teach them a recipe that doesn't require much sugar, it's a bonus......for me.......and the rest of the school.


One of the boys {not this one} told me that his mom doesn't allow him to 'pour' when helping with the cooking at home .........but he learned to do it today and he didn't spill a drop.


Anything that's loud and has a motor, boys are ALL over.  They were diggin' the Magic Bullet.
Here are the recipes that are included in the .pdf version of Kids Get Cookin'....just click on the picture to enlarge.  Enjoy!


I love to hear from you! To leave a comment, click on the “Post a Comment” link below. Have a peaceful day.

Pin It

December 22, 2010

The Pressure's On! Cowboy Cookies for Healthy Cooking Group

The pressure is on again....Healthy Cooking Group's annual healthy cookie exchange.  I know, it's kind of an oxymoron isn't it.  One year, I remember baking a zucchini cookie that was about the ugliest cookie you've ever seen.  They stuck to the waxed paper and everything.  So this year, I baked one of my favorite recipes, Cowboy Cookies, but made them a little healthier by cutting down on the butter, sugar and adding some chopped apricots and whole wheat flour.  Chocolate and apricots is one of my favorite flavor combinations of all time, so why not put them in a cookie together?!


Here's what you need........


Plus some chopped, dried apricots........

Paige helps out by creaming the butter, vanilla and egg.


Mix all the dry ingredients {recipe below}.  Then mix the creamed butter and dry ingredients together.  You're going to have to use your hands for this, there's no other way, because of the lesser amount of butter and only one egg, your hands need to help bind the ingredients into small walnut sized balls.  Paige is an expert Playdough baller and she was a BIG help in this portion of the recipe.


Bake at 350 for 11-13 minutes.


And boy, are these good!  I love the chopped apricots!  You can substitute any dried fruit if you wish.....dried cherries would be fantastic as well!  Especially for Christmas!


Healthy Cooking Meeting, here we come!


Cowboy Cookies

1 1/3 cup quick cooking oats
½ cup packed brown sugar
½ cup white sugar
½ cup pecans or walnuts, chopped {optional}
1/2 cup dried apricots, chopped , or any dried fruit or even shredded coconut!
1 cup semi-sweet chocolate chips {I used milk chocolate}
3/4 cup all purpose flour
2/3 cup whole wheat flour
1 t. baking powder
1 t. baking soda
¼ t. salt
½ cup butter, softened
1 egg
1 t. vanilla

Preheat oven to 350 degrees. Grease cookie sheets. In a large bowl, combine oats, brown sugar, white sugar, pecans, chocolate chips, flour, baking powder, baking soda and salt. In a medium bowl, cream together butter, egg and vanilla. Stir into dry ingredients. You may need to use your hands to finish mixing. Shape into walnut sized balls. Place 2” apart on prepared cookie sheets. Bake for 11-13 minutes. Enjoy!

Related posts you may also enjoy:
October's Healthy Cooking Meeting
Healthy Cooking Group Night
My Healthy Cooking Group


Pin It

December 5, 2010

Oh Christmas Tree & Cranberry Banana Bread

I think we've got this Christmas tree shopping thing down.  We had a super busy weekend; three nights in a row of parties or outings, tree shopping, more decorating, house cleaning and 4H Cooking meeting at my house, so we had to save time where we could.  Before arriving at the tree lot {no we don't go to a tree farm} I gave Bryce and Paige the run down of what to look for.........a tall, thin Christmas tree.

First row, second tree, we're done!  Back home to decorate some more.


Decorating went pretty smoothly as well.  Dominic did the lights, the kids put the balls and decorations on the tree and I followed behind them to spread out the clusters of 20 they hung on the bottom 1/4 of the tree.  Pretty soon we were completely finished.


I found these mini ceramic, holiday loaf pans at Michael's for $1 each.  Perfect for 4H cooking class that we had going on this weekend.  I found a recipe for a festive Cranberry Banana Bread online at Channel3000 that I thought would work for a group of 10. 


Everyone was really pleased with their creation and happy to be able to take home the ceramic loaf pan to bake something else in after their Cranberry Banana Bread was gone. {recipe below}


I received a Tasting Box from Foodzie in the mail and wanted to give you a peek of what was included.
Alfajores Cookies, Heirloom Cranberry Beans, Bacon Peanut Brittles, Parmesan Flatbreads and Fleur De Sel Caramel Popcorn.


How was your weekend?  Are you finished decorating and Christmas shopping yet?

Cranberry Banana Bread

Makes one 9 x 5-inch loaf

Ingredients:
• 4 tablespoons butter, softened
• 1 cup sugar
• 1 egg
• 2 teaspoons baking powder
• 1/2 teaspoon salt
• 1/2 teaspoon cinnamon
• 1/4 teaspoon nutmeg
• 2-3 large ripe bananas, mashed
• 1/2 cup milk
• 2 cups all-purpose flour
• 1 cup fresh or unthawed frozen cranberries, chopped*
• 1/2 cup walnuts (optional)

Preparation:
1. Preheat oven to 350 degrees F. Lightly grease a 9 x 5-inch loaf pan.
2. In a large bowl, combine butter and sugar; beat until light. Add egg and beat well. Add baking powder, salt, cinnamon, nutmeg, bananas, milk, and flour; beat until well blended. Fold in cranberries and walnuts; stir until well mixed. Spoon batter into baking pan.
3. Bake for 1 hour, or until lightly brown on top and a tester inserted in the center comes out clean. Cool 10 minutes in pan; then remove from pan and cool on rack.

* Note: It works best to chop the fresh or unthawed frozen cranberries in a small food processor.

Happy Sunday!


Pin It

December 4, 2010

Cooking with the Kids & Teaching Knife Safety

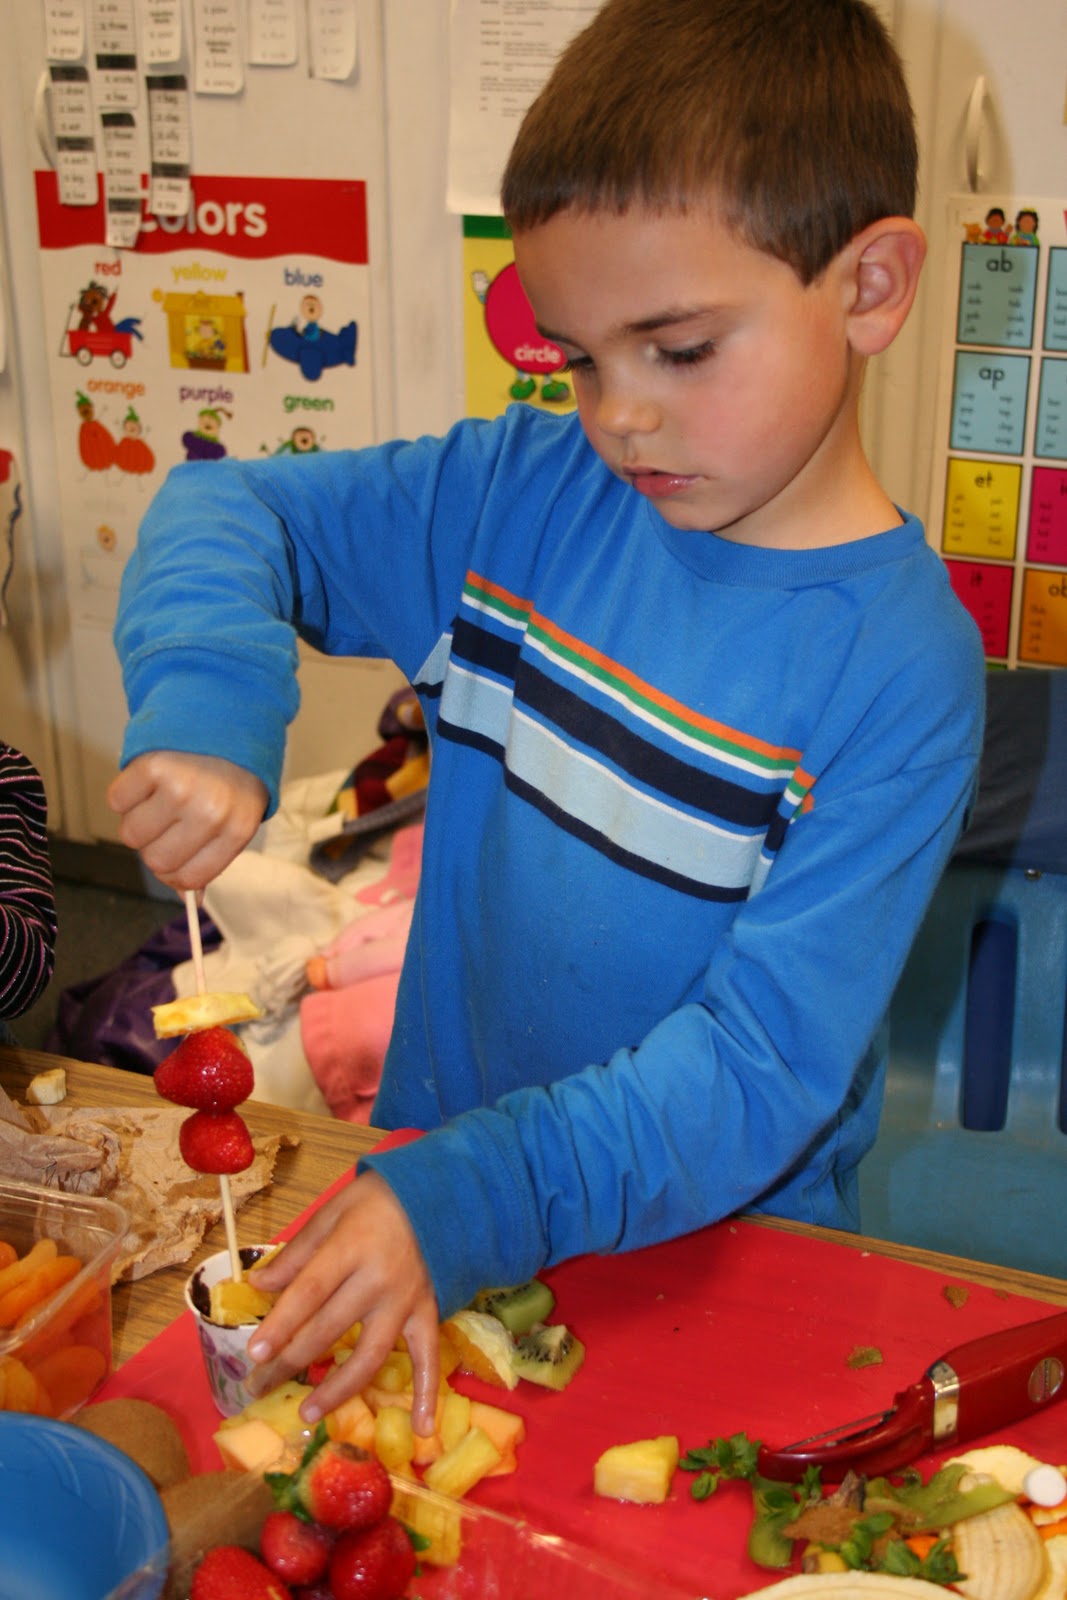
Yesterday was my bi-monthly visit to Bryce's school to teach the K-1 class cooking.  Bryce Loves fruit and would probably be entirely happy if I allowed him to live off of fruit, raw veggies and meat, so at his request, we prepared Fruit Skewers in cooking class.  I also thought this would be a perfect opportunity to teach the kids about knife safety in the kitchen.

I brought in pineapple, kiwi, bananas, oranges, strawberries, cantaloupe, and dried apricot and marshmallows just to mix it up a bit. 

Knife safety tips
#1  Always cut away from your body with the sharp edge facing away from you.
#2 When chopping or cutting food, go slowly and hold the food with your fingers curled under.
#3  Always use a cutting board so the knife does not cut the table or counter top, plus the slick surface of a table could cause the knife to slip.
#4  Keep the knife blade pointing away from other people.
#5  Always make sure to get an adults permission before using a knife to cut anything.

With all that said, the kids were chopping machines!  Very proficient.  They also felt very responsible - being allowed to use a knife.


After the chopping was complete, they began to skewer their fruit and marshmallows.


{the 2 year old in the photo who was visiting, was not allowed to use a knife, but she was allowed to skewer and eat}


We melted some chocolate in the microwave, poured it into individual cups and they began to dip away! 


Oh, and Bryce also would live off of chocolate if I allowed it also:)


Happy Saturday!

Pin It

November 20, 2010

More Than One Reason To Call This A Topsy Turvy Cookie Pizza!

As most of you know, I volunteer at Bryce's school twice a month to teach the 1st Graders a cooking class....all five of them {he goes to a one-room school}.  So imagine how loud it can become when five boisterous six year olds find out we're baking a Cookie Pizza, topped with chocolate and m & m's!  The most difficult part for me is to try and keep all of their high pitched voices down, as to not disturb grades 2-6th next door in the other room.  We do our best.


So here are the ingredients you'll need {recipe below}.


Mix all the ingredients together, sugar, brown sugar, egg, butter and vanilla first.  Then add the flour and baking soda.  Stir, Stir, Stir.  Dough should be stiff.


I had never made this recipe before, and I didn't realize that a regular sized cookie sheet would be too large.  So, I had the kids spread the dough on only half the pan.  I was sure it would turn out just fine.


Until I went to put the pan in the oven.  Whoops.  One of the things I tend to forget about the little one room school is that everything is in mini-me sizes, including the oven.  This is when I taught the kids to improvise.  One can make almost anything work if one tries.....right?  I then, secretly began to pray.  Please, please, PLEASE turn out!


Half way through the baking process, I took a peek and saw that the batter was sliding off the edge to one side, onto the bottom, inside of the oven.  Improvise again, tip the pan in the other direction.  Finish baking.

The "Topsy Turvy Cookie Pizza" was then renamed to "Molten Lava Cookie Pizza", which the kids liked even better!


After melting the chocolate and allowing the 'cookie' to cool, the kids spread the chocolate to cover the cookie.


Sprinkle with m & m's and slice with a pizza cutter.


This was GOOD!  And it didn't look half bad either.


Clean up time!

Topsy Turvy {Molten Lava} Cookie Pizza


Ingredients:

• Non stick baking spray
• 1 egg
• ½ cup packed brown sugar
• ¼ cup sugar
• ½ cup {1 stick} butter
• 1 tsp. vanilla
• 1 ¼ cups flour
• ½ tsp. baking soda

SAUCE:

• 1 cup chocolate chips
• 2 T butter
• 3 T milk
• 1 cup powdered sugar
• ½ cup m&m’s

Directions:

Preheat oven to 350. Spray baking pan with non stick spray. Crack egg into bowl, add brown sugar, sugar, ½ cup butter and vanilla to egg. Stir with wooden spoon until mixed. Add flour and baking soda to sugar mixture. Stir until mixed {dough will be stiff}. Spread dough in the greased pan, using back of spoon or hands. Bake for 15 minutes or so until crust is golden. Cool for 10 minutes.

For sauce: put chocolate chips, 2 T butter and milk in saucepan. Cook over low heat about 5 minutes, stirring all the time with the wooden spoon, just until chocolate chips are melted. Add the powdered sugar to chocolate mixture and stir until smooth and shiny. Spread sauce over crust and sprinkle m&m’s.

Happy Saturday!

Pin It